In the right hands, the Bazooka is a skillful weapon. It is always in plentiful supply and has a few neat tricks to learn. When inflicting maximum damage, the Bazooka can claim a moderate 45 points of health from your foe! To make the best of the Bazooka you must learn from the environment. It is greatly affected by the strength and direction of the wind and in some situations it can become almost aquatic in its abilities.
Homing Missile[]
The Homing Missile gives a helping hand to those players trying to pick off a hard target. Before firing the Homing Missile, you must first mark on the landscape their desired point of impact. Make sure that it is fired with enough power to make it past any obstacles that may be in its way as it travels towards its target. Very useful when there's no direct line of sight to your opponent! A direct hit can result in 45 points of damage.
Mortar[]
The Mortar is a weak weapon at face value, the shell that is fired does hardly any damage to your opponent and has a small blast radius. The real power behind this weapon lies in its spread of clusters. The trick to maximizing the effect of these little beauties is to try and make them detonate all in the same place.
Homing Pigeon[]
The Homing Pigeon is a very powerful yet dim bird. It acts rather like the Homing Missile in that the user has to mark the landscape before firing it and when fired it makes its own way towards the target. However, the Homing Pigeon is not only more intelligent in avoiding obstacles between you and your opponent, but it can also inflict a devastating 70 points of damage if it manages to find the target correctly!
Grenade[]
This weapon makes up the basic "Worms arsenal along with weapons such as the Bazooka and the Shotgun. The player can set the Grenade fuse time, while how long the fire button is pressed for decides how far the Grenade is thrown. Mastering the Grenade is an essential skill, and is all part of becoming a top Wormer! A direct hit can result in 45 points of health being claimed from your opponent.
Cluster Bomb[]
This Grenade-like weapon explodes after its fuse burns down, and showers the surrounding area with powerful cluster fragments. The actual explosion from the Cluster Bomb doesn't do much damage, it's the clusters that contain all the power, and so the key to this weapon is trying to make all the clusters hit the same place.The amount of damage the Cluster Bomb does is dependent on how many clusters hit the target.
Holy Hand Grenade[]
The Holy Hand Grenade is a super-strong weapon that can wreak absolute havoc when used in the best possible situation. The key to getting the most from the Holy Hand Grenade is to use it in a bunched area of enemy worms. Don't worry either if they're in the center of the landscape, the Holy Hand Grenade will catapult the enemy high and wide... often resulting in watery deaths. The Holy Hand Grenade can cause up to 100 points of damage. Excellent!
Banana Bomb[]
The Soft Fruit of Doom! This is like a heavily pumped-up version of the Cluster Bomb. After a Banana Bomb's fuse burns down, it splits into five Banana-bomblets, which shower the landscape and cause mass devastation. Each of these bombs can cause up to a maximum of 75 points of damage. Watch out though, if you aim this high into the air there is a chance that the bombs will spread out far enough to damage one of your own worms.
Shotgun[]
One of the most useful weapons in the game, the Shotgun comes loaded with two rounds of ammunition, making it a rather tactical weapon in the right hands. The weapon is activated as soon as the fire button is pressed, one shot is taken and then the second one after that. Be careful though, if your worm falls too far or stumbles onto a Land Mine and gets injured, your turn is taken off them and you do not get to use your second shot. Disaster! Each round from the Shotgun blows a hole the size of 25 points in your enemy's health.
Uzi[]
The weapon of choice for gunning worms about the landscape. The Uzi fires a stream of rounds off in one go, while the direction of firing can be strafed around the target area. It can send worms sliding long distances, and is perfect for grouping your enemies together. All in all, the Uzi can claim about 50 points of energy from your unwitting foe.
Petrol Bomb[]
The Petrol Bomb is a great weapon! Remember that the flames will remain for a short while where they land, which means your enemy will more than likely be trapped by the surrounding flames, unable to move without using a utility such as the Ninja Rope. The Petrol Bomb can do serious damage when used correctly.
Part 2[]
Fire Punch[]
The Fire Punch sends your enemies flying in all directions, and in the best circumstances, onto mines or off the landscape! The Fire Punch must be activated while standing directly next to your arch-enemy. When so positioned, it sends them flying in the direction that you're facing and chops 30 points from their health.
Baseball Bat[]
The Baseball Bat is an excellent weapon for removing unwanted enemies far and lengthy distances across the landscape often with wet results. And remember not to waste the Baseball Bat when you can knock worms into the water using other, less useful weapons, such as the Prod. The Baseball Bat can cause up to 30 points of damage.
Viking Axe[]
This is a weapon quite unlike all the others. The Viking Axe is a close-combat weapon which splits your enemy's health in two and buries the poor victim into the landscape. If a worms' health is down to a single point then the Viking Axe will kill them.
Prod[]
Ack!! You want to upset somebody!?! What're you playing at with this one then, eh?? Oh alright... we'll let you off... it is kind of funny. The Prod move is the ultimate insult, even more so when you get it right. It doesn't do any damage, just gives your opponent a nasty little push in the intended direction.
Land Mine[]
Your standard army issue Land Mine, works like every other Land Mine on the landscape. Ensure that you have enough time to run away after dropping the Land Mine... you don't want to get caught by your own weapons!
Dynamite[]
Do we really need to say much about this one? It's Dynamite... so be careful with it! Once you've dropped it, you'd better pray you make good with your escape plan, because the Dynamite takes no prisoners! It has a 5 second fuse and a nasty habit of blowing a huge 75 points of health off anything caught in the blast.
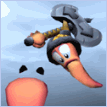
Sheep[]
Exactly what goes on inside the Sheep's mind? Best not to think about it, just let him go and watch him bounce across the landscape. If the Sheep comes across an obstacle or ravine then he will do his best to get across it. Pressing fire once sends the Sheep on his way, and then a second press detonates him, if he's left too long jumping around then he will get tired and do something about it himself. A Sheep in the face can do as much as 75 points of damage!
Super Sheep[]
Our favourite farmyard animal dons his cape and takes to the sky! This Sheep can fly! After being released, a second tap of the fire button will send him shooting upwards into the sky, where he can be flown around the landscape. How cool is that?
Old Woman[]
The Old Woman is a deadly timed explosive weapon that has to be precisely used otherwise you could end up being the worm on the receiving end of the grumbling pensioner. Best used in situations where you are above the enemy worms and well out of harm's way. Simply press the fire button to release her and enjoy the carnage she brings. The Old Woman can cause up to 75 points of damage.
Mad Cows[]
The Mad Cow is a mobile, explode on impact no-nonsense weapon. They do tend to work on the principle of 'safety in numbers', so if you come across these characters it could be you who ends up as chops! Each Mad Cow can cause up to 75 points of damage.
Air Strike[]
The Air Strike is a great weapon for attacking quite large areas of landscape and provide a method for a sure-fire kill if the enemy is out in the open when sudden death begins. Each missile can achieve a maximum of 30 points of damage.
Concrete Donkey[]
The Concrete Donkey... oh yeah this is the one to use alright when the enemy just won't come out of that nifty little bunker they've created for themselves.
Part 3[]
Jet Pack[]
Who would have thought that worms would have been able to fly without the aid of explosives? Amazingly, equipping the Jet Pack allows your team of squishy troops to take to the skies! Once the Jet Pack is active, the amount of fuel remaining can be seen displayed in numbers above your worm. Pressing the fire button fires the engines. Usefully, most weapons can also be dropped off of the Jet Pack by pressing the jump button, giving your high-flying worm plenty of time to beat a hasty retreat!
Ninja Rope[]
When the Ninja Rope hit the streets in the original 'Worms', it created various new styles of gameplay and amassed thousands of its own fans with its incredible amounts of flexibility and high fun content. The Ninja Rope in 'Worms 3D' provides a classy looking travel tool and can be used to deploy weapons such as the Dynamite, Bazooka and Grenade in mid-air.
Teleport[]
Ideal for getting around, simply select where you want your little guy to go, press the fire button, and hey presto! You're there!
Parachute[]
The Parachute is great for drifting from high to low landscape. Ensure that the wind is blowing in the direction you wish to travel and simply launch yourself into the air. The way to get the most out of your Parachute is to open it when you are at the peak of your jump. If the wind is only blowing mildly in the desired direction of travel and the ground below is water-filled, don't risk it. More often than not, this will end in the unfortunate demise of your worm.
Girder[]
The main use of the Girder is to bridge gaps allowing your worms to get to places they otherwise couldn't reach. However, it can also be used to provide a small defensive shield that will withstand one direct hit of the Bazooka before leaving your worms exposed.
Freeze[]
The Freeze utility is great to use when one is about to be involved in a Sudden Death battle, as it not only provides an impenetrable shield around your worm, but also protects frozen worms from the energy-sapping effects of Nukes. Pretty cool huh? A word of warning though, be careful not to use Freeze when you haven't got much land beneath you, because if you're not too far above sea level and the enemy plant a well placed Dynamite near your toes, it could be you who looks worried as your icy wriggler has a paddle in the drink!
Scales of Justice[]
Ah yes, the Scales of Justice, a cruel, cruel weapon to use when you only have one worm left and the enemy has many worms. Just as the enemy is counting their chickens. Slam! They get hit with the Scales of Justice. Grin smugly as your pink friend gets a healthy top up from the soon to be unhealthy enemy and laugh with glee as your enemy winces! The maximum damage that can be incurred varies at all times.
Earthquake[]
This causes the landscape to shake from side to side for a few seconds, making the worms slide around, sometimes onto mines and sometimes off the edge of the land altogether! The Earthquake will also make all the other objects on the land slide around, Crates, Oil Drums and Land Mines!
Nuclear Test[]
The Nuclear Test is a weapon that when used, makes the water rise quite a considerable amount. Not only that but it will also make each worm on the landscape ill. This means 5 health points will be taken from each worm per turn. Remember though, if your worms do get ill they can be cured easily by collecting a Health Crate.
Skip Go[]
Skips the current Worm's turn and play passes to the next player. Very useful if you are hiding out or unable to give a decent attack!
Surrender[]
Triggering Surrender ends your participation in the current round or mission. A last resort really!
Worm Select[]
Ever thought to yourself 'Ooh I wish I was controlling *that* worm"? Well now you can! This helpful little utility gives you the opportunity... but just what is it you want to do? Get closer to a certain enemy worm? Perhaps move your damaged soldiers to a safer place? Oh the choices! With Worm Select, the landscape is your oyster!
Low Gravity[]
Low Gravity affects almost all of the weapons in some way or another. Weapons can be thrown further, everything bounces higher and the effects of explosions are more dramatic: worms can be blown all over the landscape! But as well as using this utility for offensive purposes, it's also useful if you need to get somewhere without using a Ninja Rope or Jet Pack, as your worms can jump and back-flip over greater distances!


